


Fermentation Kit 2
For our second group-fermentation journey, we’re going to introduce you to the world of miso-making—or more accurately, peaso-making. Back when we started making miso with yellow peas instead of soybeans, it was perhaps the breakthrough of breakthroughs for our fermentation lab. Now, you’ll be able to harness this endlessly versatile process at home.
The Story of “Peaso”
Noma’s journey into the world of miso-making began with a question: Could we embrace this incredible ancient technique, but express it with ingredients from our own landscape?
We had just tried to coagulate milk squeezed from local yellow peas into a kind of tofu. It didn’t quite work. Realizing that this high-protein legume might actually be better suited for fermentation, we turned to traditional miso-making methods.
The result was lower in salt than traditional misos (4% versus 9-15%), and the relatively short fermentation time (3 months versus 6-12) yielded a remarkably balanced profile that was round and rich in umami, but also fruity, bright, and fresh.
This peaso was a revelation, one that has provided endless inspiration ever since.
We hope the concept will take on a life of its own in your home.
But first: the basics
In the production of miso—which can take anywhere from weeks to years—simple ingredients are broken down by enzymes and microbes into savory, rich pastes that add complexity to everything from broths and sauces to marinades and desserts. It’s a perfect expression of patience, precision, and natural forces working together.
Traditional miso calls for soybeans and rice koji, but as you know, we’ve embraced the idea that the process is flexible. Beyond peas, you can create misos from a wide range of proteins and starches—like barley, chickpeas, rye bread, corn, and even nuts. The key is understanding the core elements:
Protein → legumes, to be broken down into amino acids for umami.
Starch → grains, to create sugar for microbial activity and flavor.
Koji → the enzymatic engine of the ferment.
Salt → to control microbial activity and shape the final taste.
Time → which allows depth and character to develop.
Making miso is also about paying attention: to temperature, texture, moisture, aroma, and especially, how ingredients behave in your environment. Each batch is a learning opportunity and over time, each one becomes a unique reflection of your time and place.
Shaping flavor at home
As we’ve alluded to, there are different ways you can shape the profile of your miso. Here are the key approaches, which you can easily apply to the basic peaso-making instructions in the next section.
More Cereal or More Koji → Sweeter Miso Using more koji, or another grain that contains starch, will sweeten the deal.
More Protein → More Umami Beans, legumes, and even nuts will increase savory intensity.
More Time → Deeper, Darker Flavors The longer the fermentation, the more caramelized, complex, sweet, and generally “aged” in flavor. But longer doesn’t always mean better.
You can accent with different flavorings. For example, we use 5% of elderflower to make our miso.
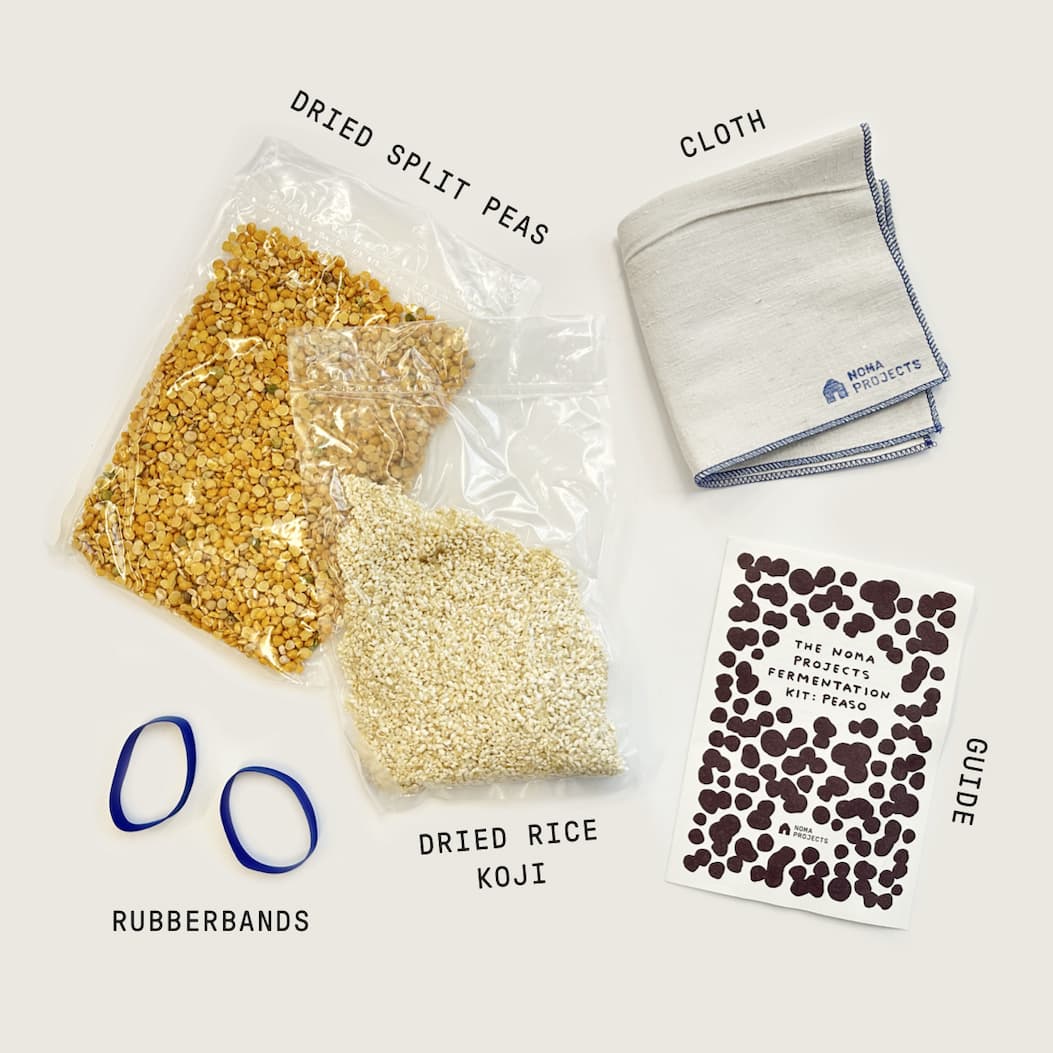
This pouch contains everything you need to make peaso, except for a few tools that you likely have at home.
Tools
Pot
Food processor or meat grinder
Mixing bowl
Jar to ferment your peaso
Plastic film
Weights (ex. baking stones, dried beans)
Ingredients
300 g dried rice koji
300 g dried split peas
75 g sea salt or non iodized salt
70 g water
A recipe for peaso
Prepare the split peas
- Soak all your split peas in a container overnight with plenty of cold water.
- Rinse the split peas and cook them with a large amount of water until they are al dente. You will know the split peas are ready when they are still slightly crunchy but do not taste green.
- Once cooked, strain the split peas and let them cool on a flat surface without adding cold water. This important step allows the excess water to steam away, reducing the moisture content of the final product.
Prepare the Rice Koji Mixture
- Rehydrate your dry rice koji: combine 300 g rice koji with 70 g of water, stir, and let sit for 15 minutes. Afterwards, the rice grains should be crumbling when pressed between two fingers.
- In a food processor, combine the rice koji, salt, and split peas (approximately 550 g once cooked). Blend on high speed until you achieve a homogenous mixture.
- If desired, add any flavorings at this stage.
Form the Miso Paste
- Use a spatula to remove the paste from the processor. Clean your jar with hot water; if possible, disinfect it with alcohol.
- Knead the paste until it can be shaped into balls. The consistency should be similar to play-dough: tough enough to mold but not brittle or prone to falling apart.
- If the mixture is too dry, prepare a solution of 100 g water with 5 g salt. Add a few drops at a time until the desired consistency is achieved.
Assembling and Fermenting
- Shape the paste into balls and place at the bottom of your jar. Press each ball down gently toward the bottom of the container to remove air pockets.
- Once all the balls are in the jar, sprinkle a thin layer of salt on top.
- Cover the surface of the miso with plastic wrap or film, and place a weight on top to avoid air pockets. Cover the jar with a cloth secured with a rubber band.

